Sunday, April 14, 2013

Thai Peanut Noodles


I have recently become a lover of Thai food and I have always loved peanut butter, so this recipe was a natural fit.  I actually found the recipe in the P90x nutrition plan book, but have changed it a little bit.  It has become one of our favorites and before going gluten free we probably had it every two weeks. It only takes me about 15 minutes to make it.  I used to make it with fettucini noodles since they are cheaper than rice noodles, but now that is not an option, so rice noodles it is! (which is more authentic anyways)

1/2 package rice noodles
1/3 cup peanut butter
1/3 cup soy sauce
less than 1/3 cup rice vinegar (I just a 1/3 cup and just not fill it all the way to the top.  Like a 1/4 of the inch less than 1/3 cup.  if that makes sense? :/ )
2 tablespoons honey
green onions, chopped
stir fry vegetables or really any vegetables you want

Make the rice noodles according to the box.  I made them by boiling it like normal pasta and it was really hard to have them not get stuck together and then not cook though all the way.  I would definitely make the noodles the recommended way of soaking them in hot water for 30 minutes.  I think that would be easier to manage not sticking together, but I did not have the foresight to do that.

Slice up your preferred stir fry vegetables- I have used the bag of frozen stir fry veggies before but usually I just dice up some onions, bell peppers, mushrooms, carrots, and broccoli.  It makes me feel so healthy to see all those fresh veggies hanging out in one pan :).  Put a little coconut oil in a pan and saute the vegetables until they are tender.  On low heat, add in the peanut butter, soy sauce, rice vinegar, and honey.  It only takes a few stirs to get it all combined.  Keep it on low heat until the noodles are ready.

Drain the noodles and add them to the sauce and veggies.  Mix it all up so the noodles are covered and then turn off the heat and sprinkle in the green onions.  Serve immediately.  It starts thickening up and getting sticky as soon as it is done cooking so its best to eat it ASAP.

This week when I made it, I made the whole box of rice noodles so we would have enough for leftovers.  I added a little more of the sauce ingredients so that we would have enough sauce.  Feel free to play around with the proportions to suit your tastes.  I am starting to find that I use recipes more like guidelines and play around with them a lot to get exactly what I like.  I hope you enjoy it!

Tuesday, April 9, 2013

Kalamata-Balsamic Chicken with Feta

This is hands down one of my top 5 favorite meals.  The flavor profile here is one I could seriously eat every day and be perfectly happy with.  I've slightly adapted the recipe from the Cooking Light: Fresh Food Fast cookbook.  Per my notes I prefer it with more tomatoes, olives, and pinenuts - I like a little bit of everything in every bite!

Kalamata-Balsamic chicken with Feta

1 lb. frozen skinless boneless chicken tenderloins
olive oil
freshly ground black pepper
1 cup grape tomatoes, halved (I probably use 1 1/2 - 2 cups!)
16 pitted kalamata olives, halved (I close to double this as well)
3 tablespoons balsamic vinaigrette (use more if increasing the tomato/olive amounts)
crumbled feta cheese
basil leaves, shredded

Cover a rimmed baking sheet with foil.  Lightly drizzle/coat the frozen chicken tenderloins with olive oil and sprinkle with pepper.  Broil for 7 minutes.  Turn the chicken over, sprinkle with pepper again and broil for another 7 minutes until cooked through and lightly browned.

While the chicken cooks combine the tomatoes, olives, and vinaigrette in a pan.  Cook for a few minutes until the tomatoes soften.  Spoon over chicken.  Top evenly with cheese and basil.  Serve with/over the following recipe:

Quinoa with Spinach and Rosemary

1 cup uncooked quinoa
1 1/2 cups packed baby spinach, coursely chopped
1/4 cup pine nuts, toasted (you can do more or less according to your taste)
1 tablespoon olive oil
1/2 teaspoon minced fresh rosemary
1/4 teaspoon salt

Cook the quinoa according to package directions.  Place in a medium bowl.  Add the remaining ingredients and toss well.

Saturday, April 6, 2013

Our trip to tu-lu's!


With my baby due April 5th I was excited to have my mom, Karen, here to visit, as well as my sister, Jessica, who was on spring break from teaching school.  Naturally, there was much discussion of gluten-free food.  We made a trip to tu-lu's, a local gluten-free bakery here in Dallas that I've been wanting to try.  

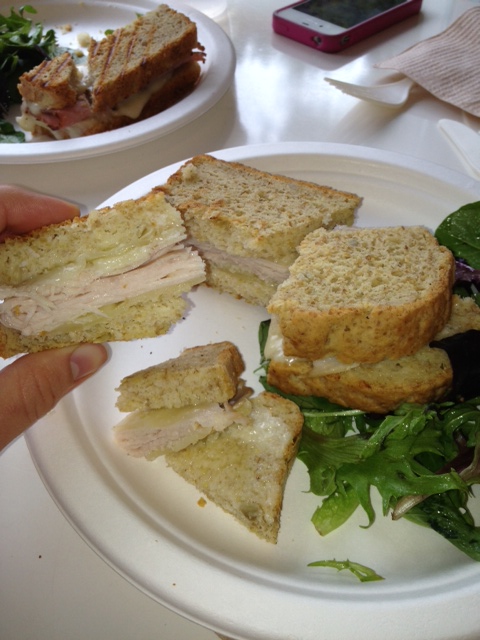
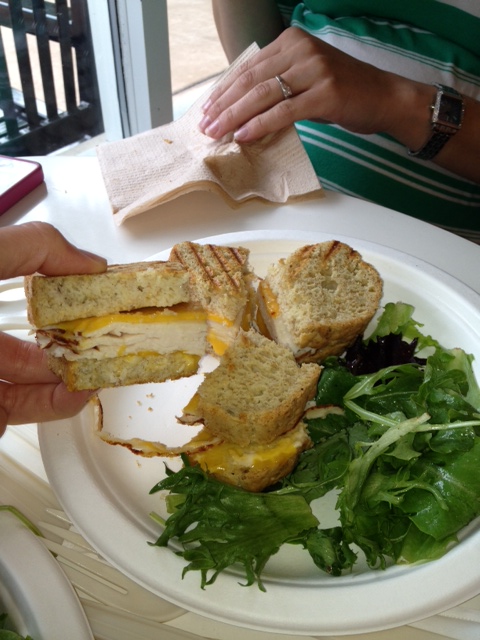
We ordered three different paninis to share as well as a piece of quiche and everything was AMAZING!  It was so weird to eat so much bread after not having it for so long, but we all enjoyed it immensely!  The different breads on the paninis were so yummy, and the crust on the quiche tasted flaky and buttery and perfect.


 Then, because we couldn't decide on cupcake flavors we got a sampler pack of 6 flavors of mini cupcakes, and then proceeded to eat every last smell of them.  Soooo Good!  We left the bakery feeling satisfied and not missing gluten one bit!  I know I will be back next time I need a special treat!


Barbecue Chicken Salad

I have a confession. I am not a great chef. I prefer baking, and when baking, I am exact to a fault. If I need to add 8 ounces chocolate chips to cookies, I get out my scale and weigh it out, adding and subtracting single chips until its perfect. The same thing goes with cooking. If I need to add 1/2 teaspoon salt to soup, I will search for my measuring spoons, measure the salt over the sink, level the salt, and then carefully add it. I'm a little bit insane...

That being said, this is the one and only food I make without checking a recipe 12 times or using measurements. I don't even USE a recipe. And it always turns out right. :)

Barbecue Chicken Salad

Chicken breast or tenderloins or (in a pinch) canned chicken
Barbecue sauce (gluten-free of course!)
1-2 heads romaine lettuce
1 can corn
1 can black beans
1 jicama
2-3 tomatoes
1 avocado
Ranch dressing


Cook chicken (I boil it, but it could be baked, sauteed  or grilled), cool, and dice. Coat with barbecue sauce and set chicken aside. 

Dice lettuce, jicama, and tomatoes. Rinse corn and black beans. Toss together. 

Serve yourself. (If sharing salad, serve others). Top with desired amount of barbecue chicken and avocado. Drizzle ranch over the top and enjoy.

Note: This recipe makes a TON! I halved it, and still have some left over...but you will need extra avocados, Juliet and I can eat one together every time we have a serving of salad.

BEST. SALAD. EVER. 

Wednesday, April 3, 2013

Ernie's Three-Month Check-Up

Ernie with our son and cute son's-in-law.

Many of you are interested in Ernie's progress.  On January first, Ernie weighed 220 pounds, had high blood pressure, terrible acid reflux and a very gassy disposition.  He made the commitment to go gluten and lactose free for three months.  He also gave up soda pop and his favorite salty snacks.  

Three months later, Ernie weighs in at a svelte 201 pounds.  He looks great and feels even better.  His acid reflux is much improved and is not a much of a problem anymore and his disposition is now just sunny and bright (not g-a-s-s-y)!  He went to the doctor this week for a check up and the doctor said that he was a wonderful specimen of excellent health.  His blood pressure was normal and his blood work came back all in the normal range.  I am so proud of him!

The best part is that he has not felt like he has been on a diet.  There are so many things to eat that are delicious and gluten free.  Plus, he has had an amazing diet coach, chef and cheerleader (that would be me!)


Carrot Muffins

Because we are no longer baking or eating bread, muffins are a wonderful alternative.  They are easy to make and satisfy that need for a baked good.  This recipe is from the Wheat Belly Cookbook.  I put them in the freezer and then take one out for breakfast or to pop in my lunch for later.  These muffins are like a yummy, little carrot cake.  Try with a little cream cheese--Yum!

1 1/2 cups almond meal/flour
1 cup chopped pecans
1/2 cup ground golden flaxseeds
2 teaspoons ground cinnamon
1 1/2 teaspoons baking powder
1 teaspoon baking soda
1 teaspoon gound nutmeg
1/2 teaspoon ground cloves
1/2 teaspoon sea salt
1 cup shredded carrots
2 tablespoons orange peel (I didn't have any, so I didn't use any.)
1/2 cup raisins (optional)
2 eggs, separated (I have made this recipe twice.  One time I separated the eggs and beat the whites and the next time I didn't.  Didn't seem to make any difference.)
1/2 cup xylitol or 1/4 teaspoon liquid stevia or to desired sweetness.
1/2 cup sour cream or coconut milk
1/4 cup coconut oil, extra-light olive oil, or butter, melted
1/2 cup applesauce
1/4 teaspoon cream of tartar

Preheat the oven to 350 degrees.  Place paper liners in a 12-cup muffin pan or grease the cups.

In a large bowl, stir together the dry ingredients.  Stir in the carrots, orange peel, and raisins (if using).

In a medium bowl, whisk together the egg yolks, xylitol or stevia, sour cream or milk, oil or butter, and applesauce.

In a large bowl, with an electric mixer on high speed, beat the egg whites and cream of tartar until stiff peaks form.  Gently fold the beaten whites into the egg yolk mixture until combined.  Fold egg mixture into the flour mixture until well combined.  (I skipped this step and added all the wet ingredients together.)

Divide the batter among the muffin cups, filling each about half full.  Bake for 40 minutes (25 minutes), or until a wooden pick inserted in the center of a muffin comes out clean.  Cool in the pan on a rack for 5 minutes, remove from the pan and cool completely on the rack.

Important!  The first time I made these I baked them for the 40 minutes.  It was way too long and they were very overdone.  The second time I baked them for 25 minutes and they were just right.


Shrimp and Asparagus Stir-Fry

This is a super quick and easy recipe that I pulled out of an old Good Housekeeping magazine.  Full disclosure--the picture is the picture from the magazine--we ate the stir-fry so quickly I didn't have time to snap a picture!

1 cup rice--cook as you normally do
3 tsp. sesame oil
1 1/2 lbs. asparagus, trimmed and cut into 1-in. pieces
1 lb. peeled and deveined shrimp
1 tbsp. grated, peeled fresh ginger
2 tbsp. soy sauce
2 tbsp. fresh lime juice
1/4 c. loosely packed fresh basil leaves, thinly sliced

In a 12-inch nonstick skillet, heat 2 teaspoons sesame oil on medium 1 minute.  Add asparagus and cook 7 to 8 minutes or until asparagus is tender-crisp, stirring occasionally.  Add shrimp and ginger, cook 5 to 6 minutes or until shrimp are opaque throughout, stirring occasionally.  I used pre-cooked shrimp, thawed and added at just the last minute to heat through.

Stir in soy, lime, basil, and remaining sesame oil; remove from heat.  Serve over rice.

So easy and Ernie loved it.